Generate API documentation from Swagger on Ktor
SERIES: Building a backend with Ktor
- Part 1: Structuring a Ktor project
- Part 2: How to persist Ktor logs
- Part 3: How to use an in-memory database for testing on Ktor
- Part 4: How to handle database migrations with Liquibase on Ktor
- Part 5: Generate API documentation from Swagger on Ktor
- Part 6: How to schedule jobs with Quartz on Ktor
- Part 7: Moving from mobile to backend development with Ktor
When a backend project exposes some APIs, there should also be a place where the clients of those APIs can see and understand what can be consumed. This place can be a document, a text file, a website, etc.
In this article, I will show how to automatically generate and expose a website with the APIs that a Ktor project supports. The website is generated from OpenAPI (also called Swagger) definitions. To do that, the Gradle Swagger Generator Plugin will be used.
This post is part of a series of posts dedicated to Ktor where I cover all the topics that made me struggle during development and that was not easy to achieve out of the box. You can check out the other instances of the series in the index above or follow me on Twitter to keep up to date.
Setup
The first thing to do is to add the Gradle Swagger Generator Plugin in the build.gradle.kts file.
plugins {
	id("org.hidetake.swagger.generator") version "<version-number>"
}
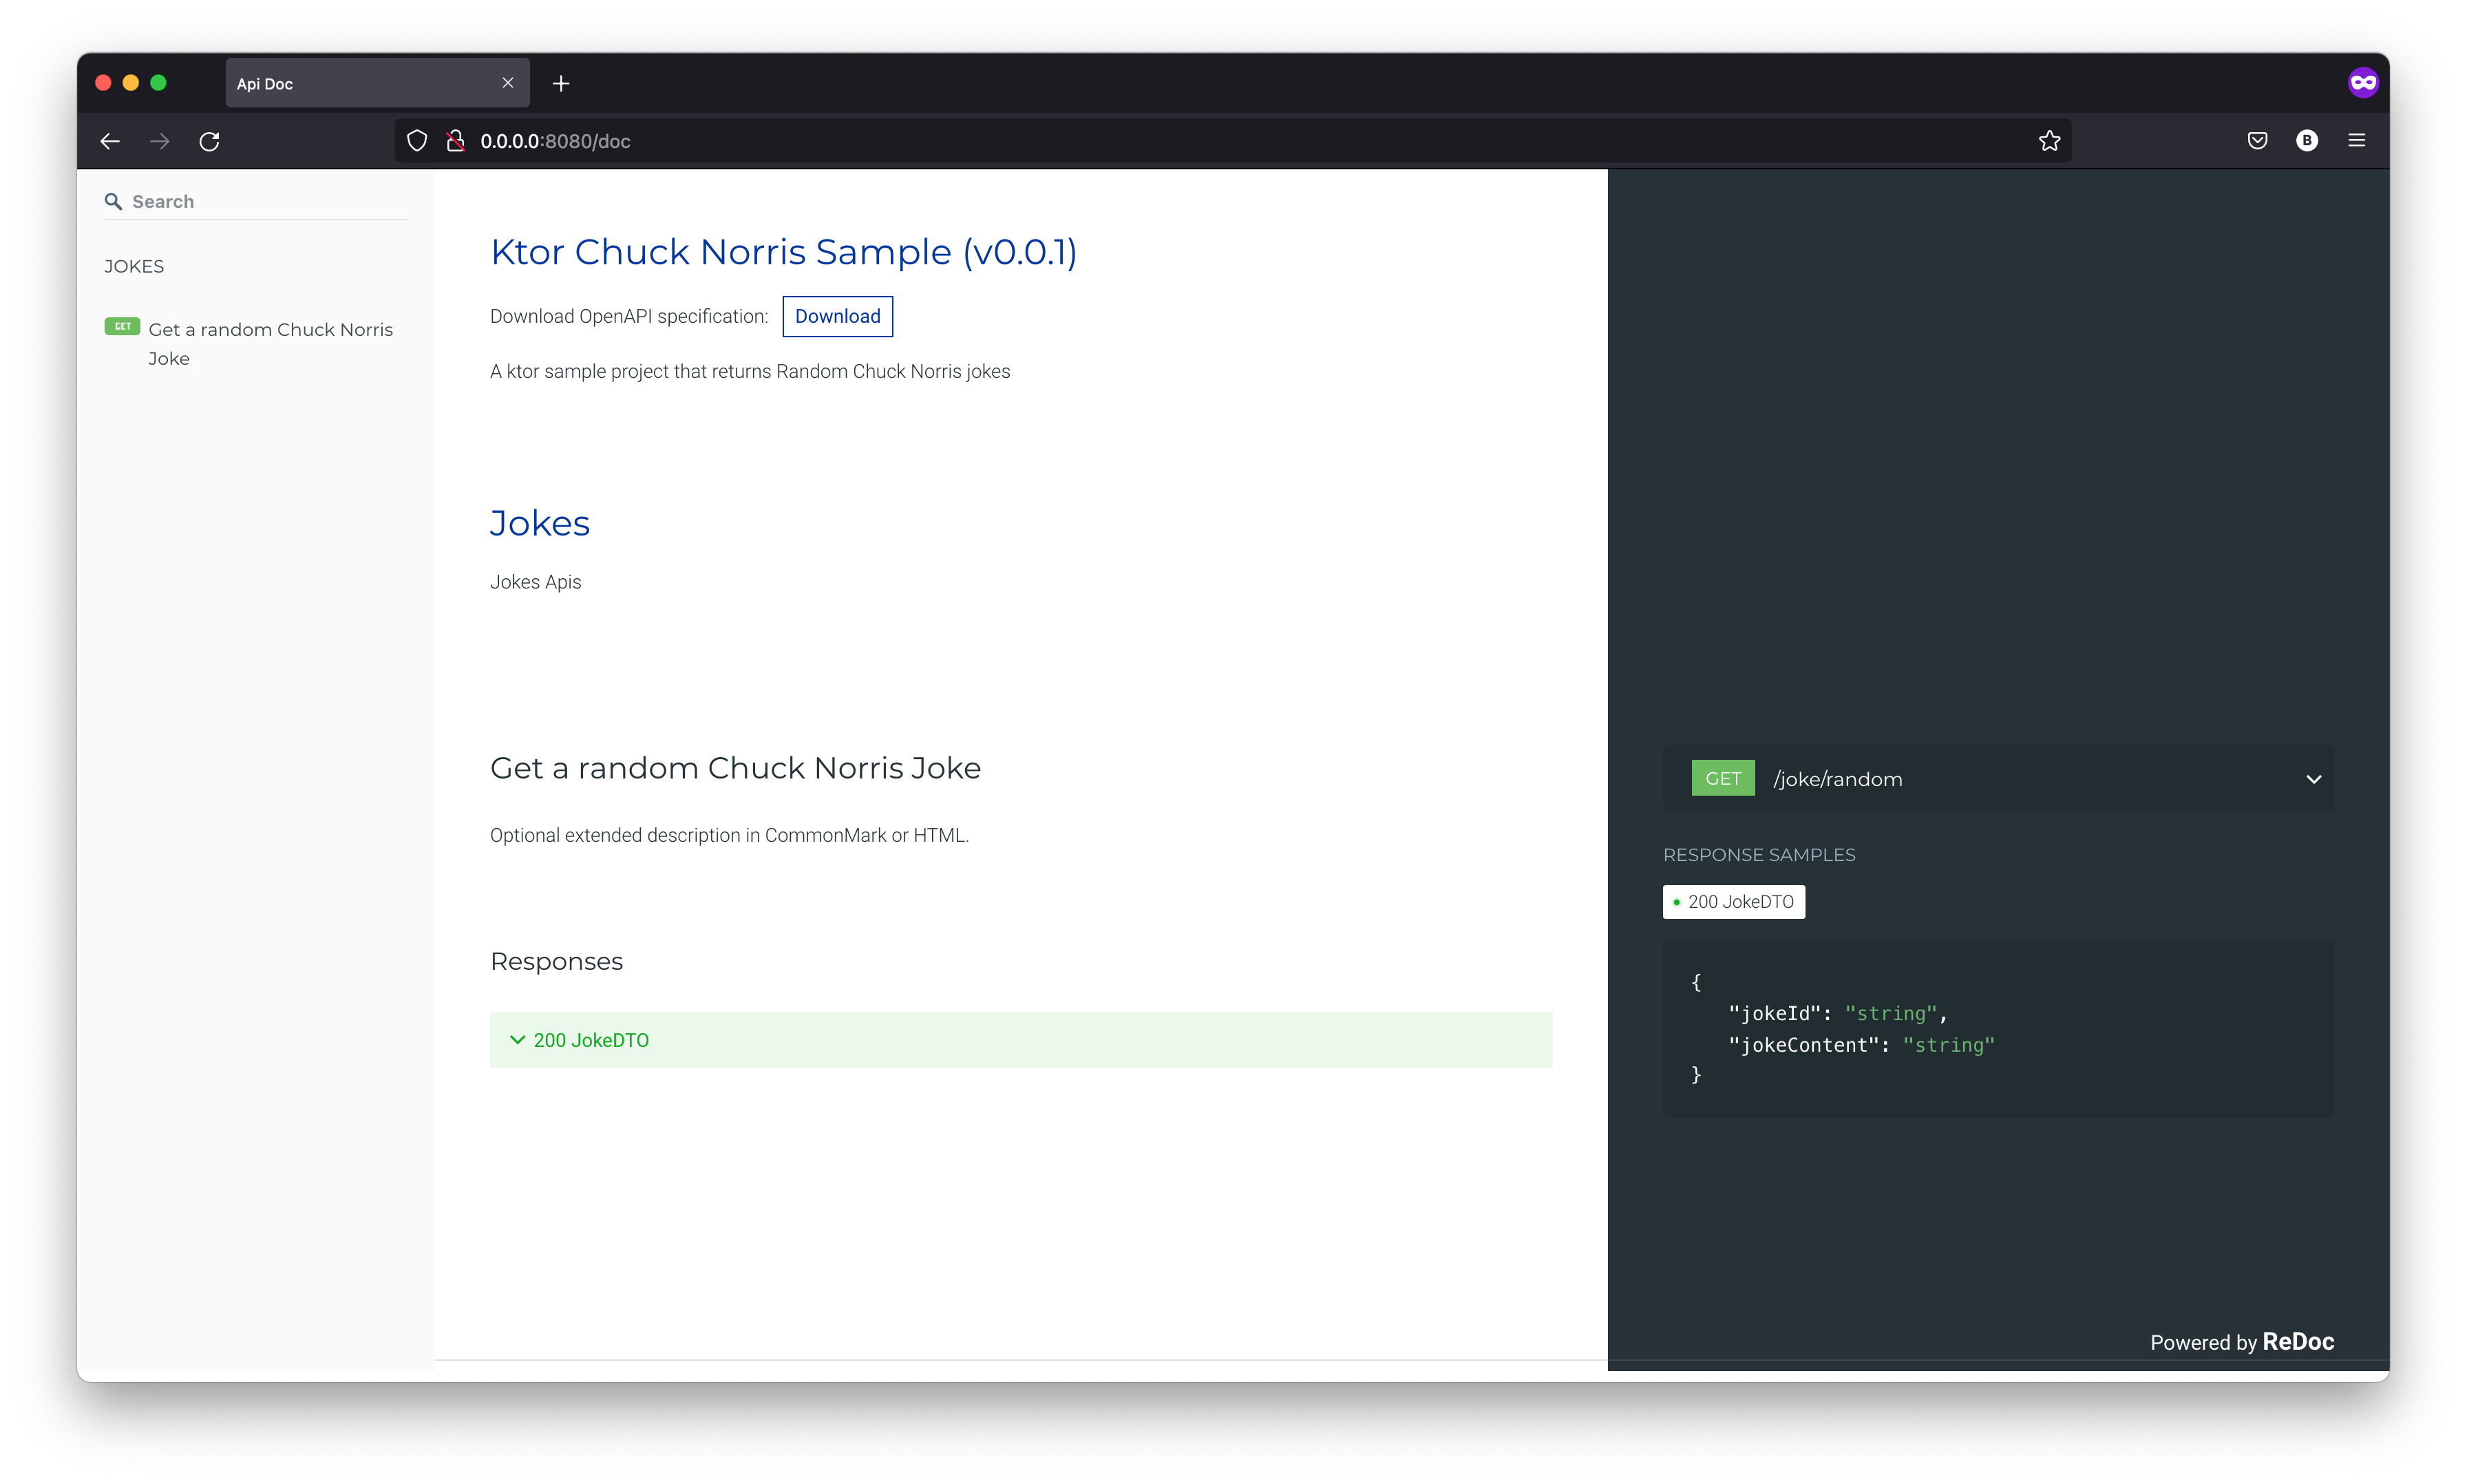
The documentation will be generated using the ReDoc tool and the UI will look like this example.
The Gradle task that will generate the documentation is called generateReDoc and it requires some configuration.
tasks.generateReDoc.configure {
    inputFile = file("<swagger-file-path>")
    outputDir = file("<output-path>")
    title = "Api Doc"
    options = mapOf(
        "spec-url" to "<swagger-url>"
    )
}
The parameters that I’ve provided are the following, but you can find more in the documentation:
inputFile-> the Swagger specification file;outputDir-> the directory where to write the generated documentation;title-> the HTML title for the documentation;options-> a map of strings to provideReDoc tag attributes. Thespec-urlis the URL or the local file address to the Swagger definition.
At this point, it is possible to run the Gradle task to generate the documentation.
./gradlew generateReDoc
However, to avoid forgetting to update the documentation between different releases, I suggest making the task run after the build one.
tasks.build {
	doLast {
		tasks.generateReDoc.get().exec()
	}
}
Expose the documentation
To access the documentation, it is necessary to expose it. Ktor gives the possibility to serve static content.
The files to serve should be placed inside the resources folder. In this case, I’ve decided to create two custom folders: one called doc for the output files (that consist of an HTML and a Swagger file) and one called swagger for the input Swagger definition.
.
└── src
    ├── main
        └── resources
            ├── doc
            │   ├── index.html
            │   └── swagger.yml
            └── swagger
                └── swagger.yml
As a reference, the inputFile and the outputFile parameters of the generateReDoc will look like that:
tasks.generateReDoc.configure {
	inputFile = file("$rootDir/src/main/resources/swagger/swagger.yml")
	outputDir = file("$rootDir/src/main/resources/doc")
	...
}
The output files can be exposed by defining the resource function inside the static block of the routing.
fun Application.module() {
	routing {
		static {
			resource("doc/swagger.yml", "doc/swagger.yml")
			resource("doc", "doc/index.html")
		}
	}
}
In this way, the documentation will be accessible from http://0.0.0.0:8080/doc and the output Swagger file used internally by the documentation HTML is available on the URL: http://0.0.0.0:8080/doc/swagger.yml.
So, from the following Swagger definition:
swagger: "2.0"
info:
  title: Ktor Chuck Norris Sample
  description: A ktor sample project that returns Random Chuck Norris jokes
  version: 0.0.1
tags:
  - name: Jokes
    description: Jokes Apis

paths:
  /joke/random:
    get:
      summary: Get a random Chuck Norris Joke
      responses:
        "200":
          description: "JokeDTO"
          schema:
            $ref: "#/definitions/JokeDTO"

definitions:
  JokeDTO:
    type: object
    properties:
      jokeId:
        type: string
      jokeContent:
        type: string
    required:
      - jokeId
      - jokeContent
The following documentation will be generated:
Conclusions
And that’s it for today. You can find the code mentioned in the article on GitHub.
In the next episode, I’ll cover how to set up background jobs. You can follow me on Twitter to know when I’ll publish the next episodes.