Running a blog with iPad
It’s been a few years since I started writing this blog, and I quite like sharing my thoughts and experiences. After a short while spent on Medium, I decided I wanted to be the sole owner of my content, so I started experimenting with different solutions and ideas. After I finally landed on the “perfect” tech architecture (I know, I’m lying. There’s no perfect solution and Future Me will most likely refactor and (over)re-engineer the current solution), I started to seek the “perfect” writing setup.
I’m pretty confident I’ve ended up with something worth sharing.
A bit about tech stack
Before speaking about the setup, I want to spend some words about the tech stack. The site is built with Hugo, one of the most popular static site generator. It is a powerful tool that lets you have a website up and running in just a few minutes. With Hugo, you can write articles or content with Markdown, and then Markdown pages are automatically transformed into HTML and CSS pages when you build the website. But how Hugo works is not the topic of this article, so if you are interested to know a bit more, I suggest you look over the documentation.
As mentioned above, the final output of Hugo is a static website and there are many free solutions to host it. To name a few: GitHub Pages or Netlify or Firebase Hosting. Personally, I’ve always used GitHub Pages and I’m still using it. If you have trouble choosing, there is an entire section on the Hugo doc there to help you.
For handling the publications, I’ve set up a little GitHub action (you can give a look at it on my GitHub) that builds the website and pushes all the changes to a special branch reserved for GitHub Pages. This action is triggered every time I push something on the master branch.
That’s it for the tech stack. It was a quick but necessary overview to better introduce the context but if you have any kind of question, feel free to reach me out on Twitter @marcoGomier.
Writing Setup
My main machine is a 15" MacBook Pro - a fantastic tool for my day-to-day job. But after using it for writing some articles, I’ve discovered that a 15" machine is way too heavy, big, and overkill just for blogging.
When I’m writing something, I like to stay outside in the courtyard, sitting in the deckchair or in the hammock or in a simple chair. And when the weather does not allow it, I prefer to stay on the couch or in bed rather than in my work setup. And in all of these scenarios, my MacBook is too uncomfortable to use. So I started to think about alternatives.
First of all, I’ve tried to resurrect my old Asus T100HA with a lightweight Linux distro, but in the end I had to drop it due to issues with some drivers and a battery not at its glory anymore. So, after some thinking, I’ve decided to give iPad a try: blogging doesn’t require a big screen and CPU power, whereas it does ask for a reliable and comfortable machine, with decent autonomy.
After some research, I found out that the best compromise between my needs and my budget was the iPad Air 3 (I made this choice back in May 2020. If it was today, I would choose the new iPad Air 4). For the keyboard, I decided to go with the Logitech Combo Touch.
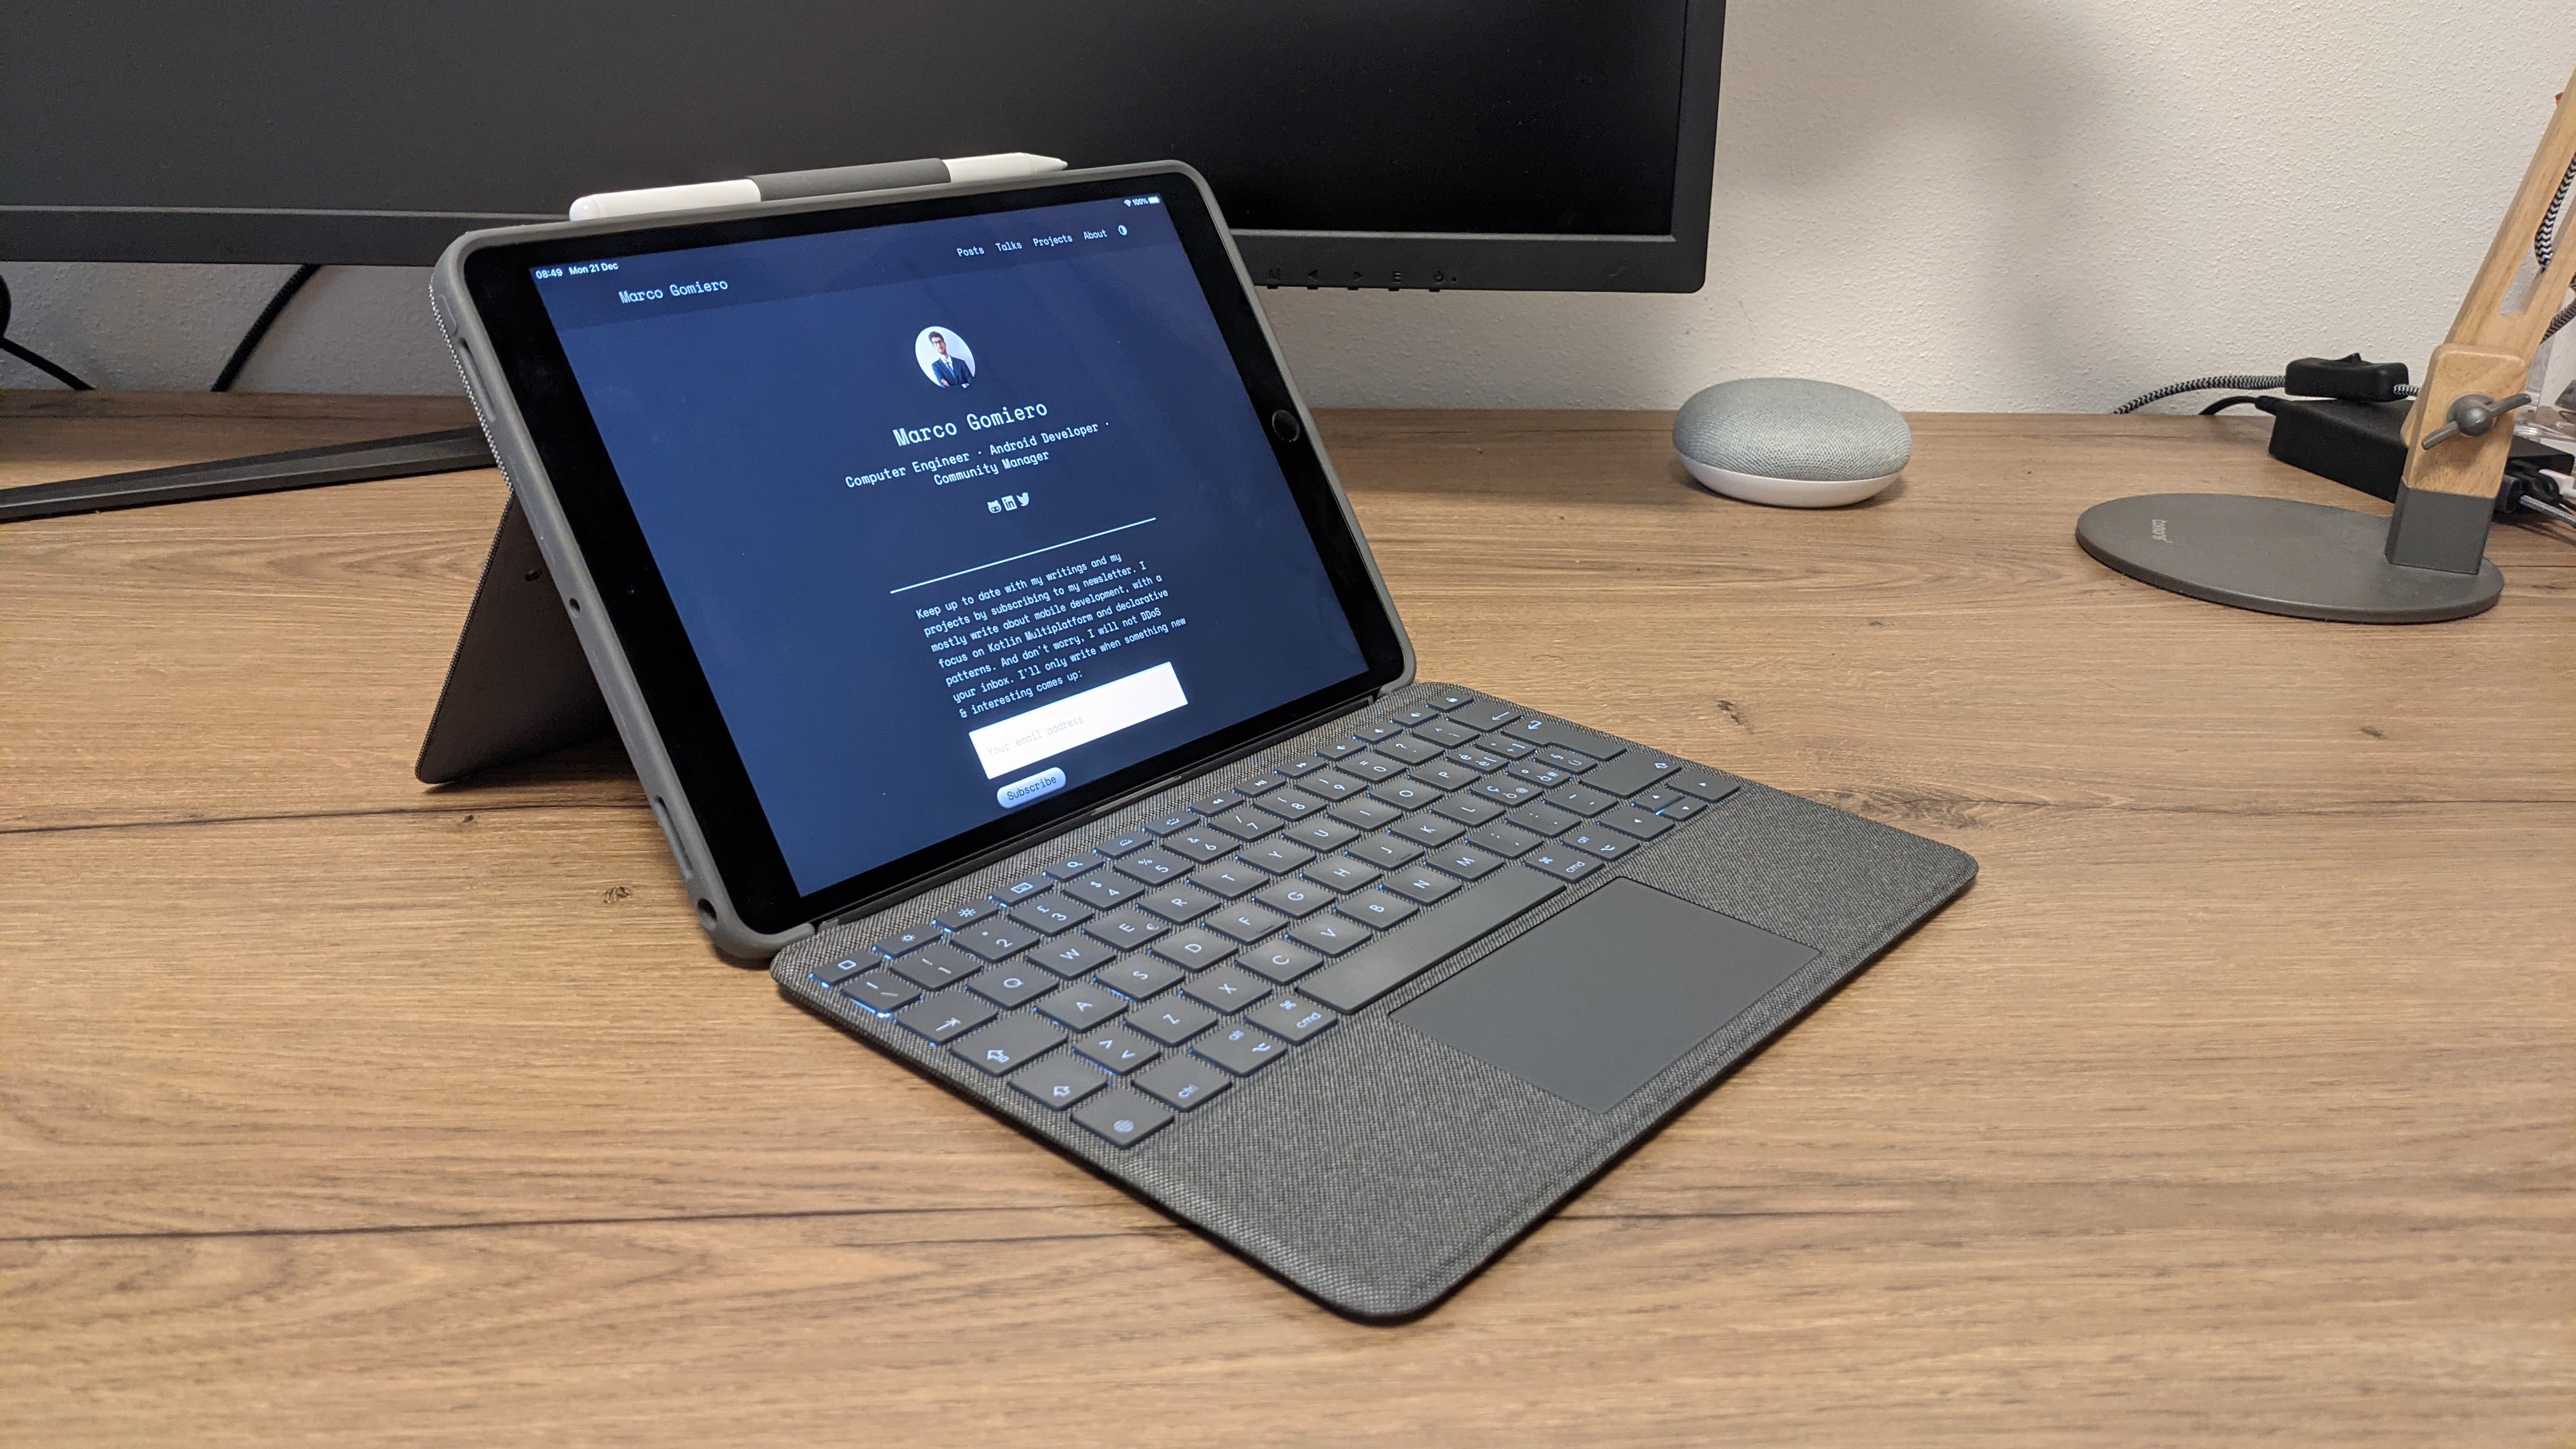
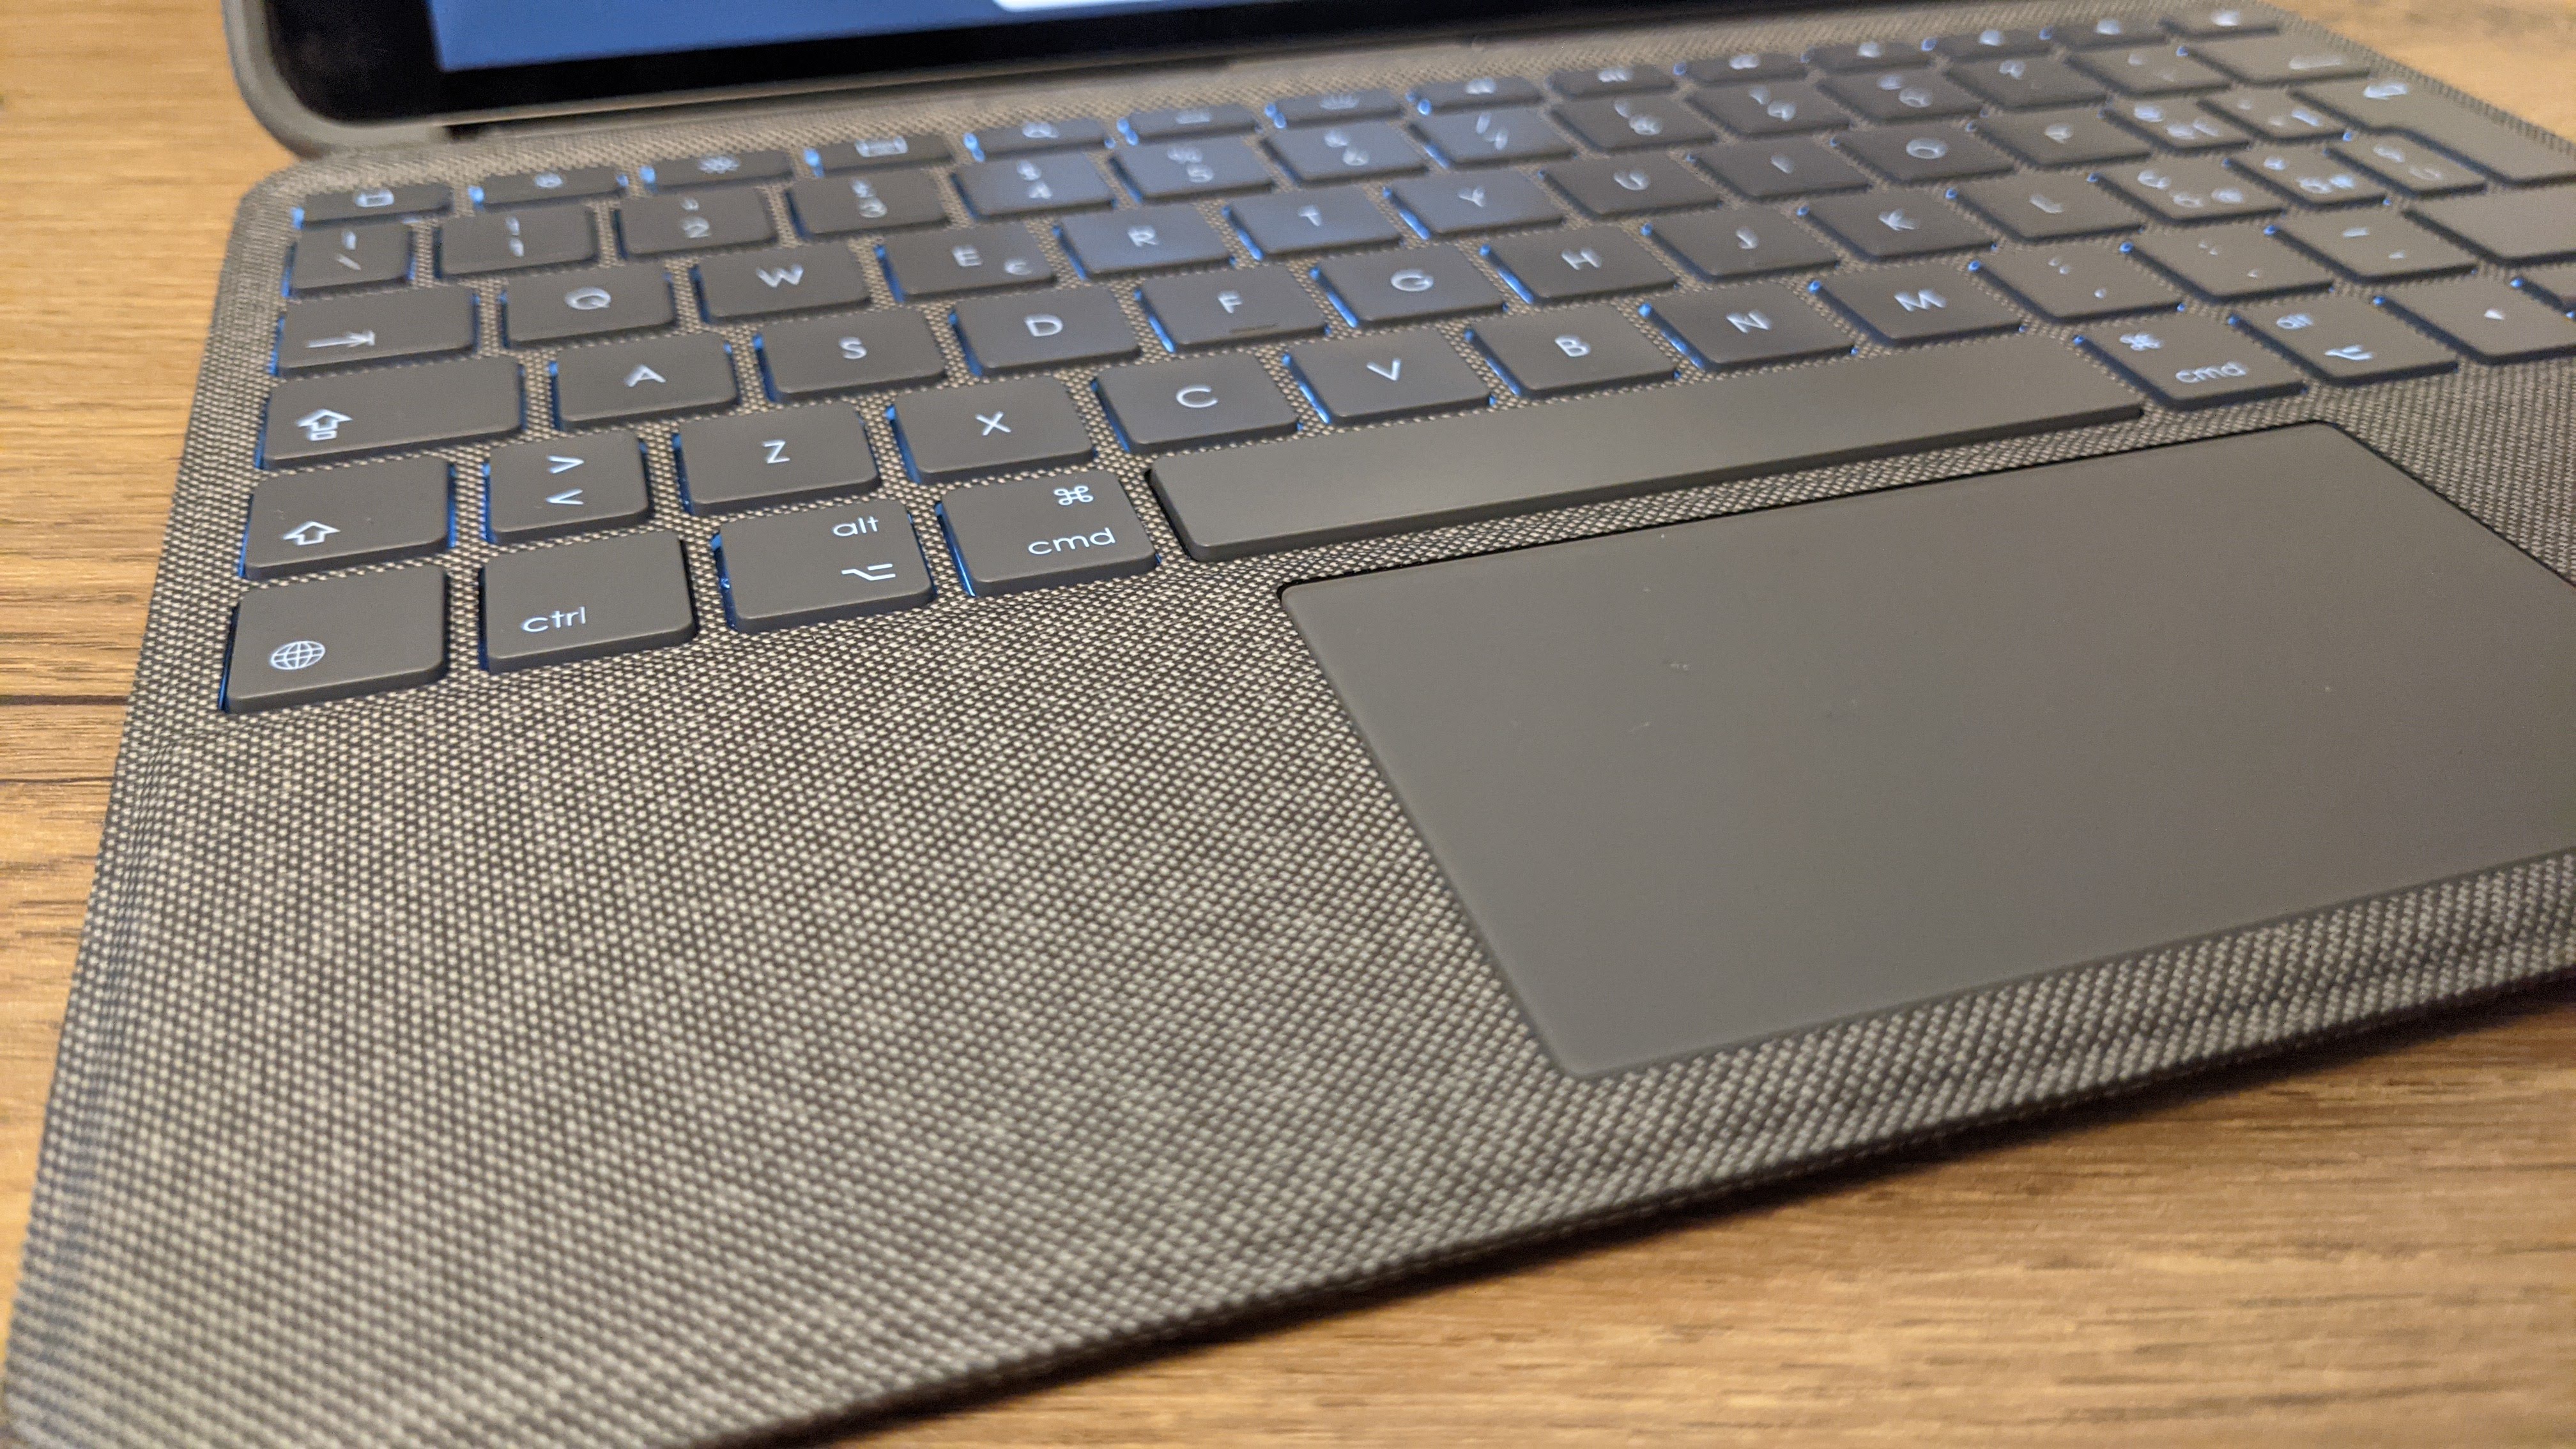
To be honest, I quickly fell in love with this Logitech solution. With this keyboard-cover, you will transform the iPad into a notebook. With the kickstand, you can tilt the iPad up to 40 degrees. Then you have a very good trackpad (better than some Window notebooks!), a row of function keys (brightness and volume controls, home button, lock button, spotlight, etc), and backlit keys.
The only compromise is the fact that it makes the iPad a bit heavier and thicker.
Applications
As I mentioned above, the website is stored in a git repository and I manage all “the git lifecycle” through Working Copy that I think is the best git client that you can find in the AppStore.
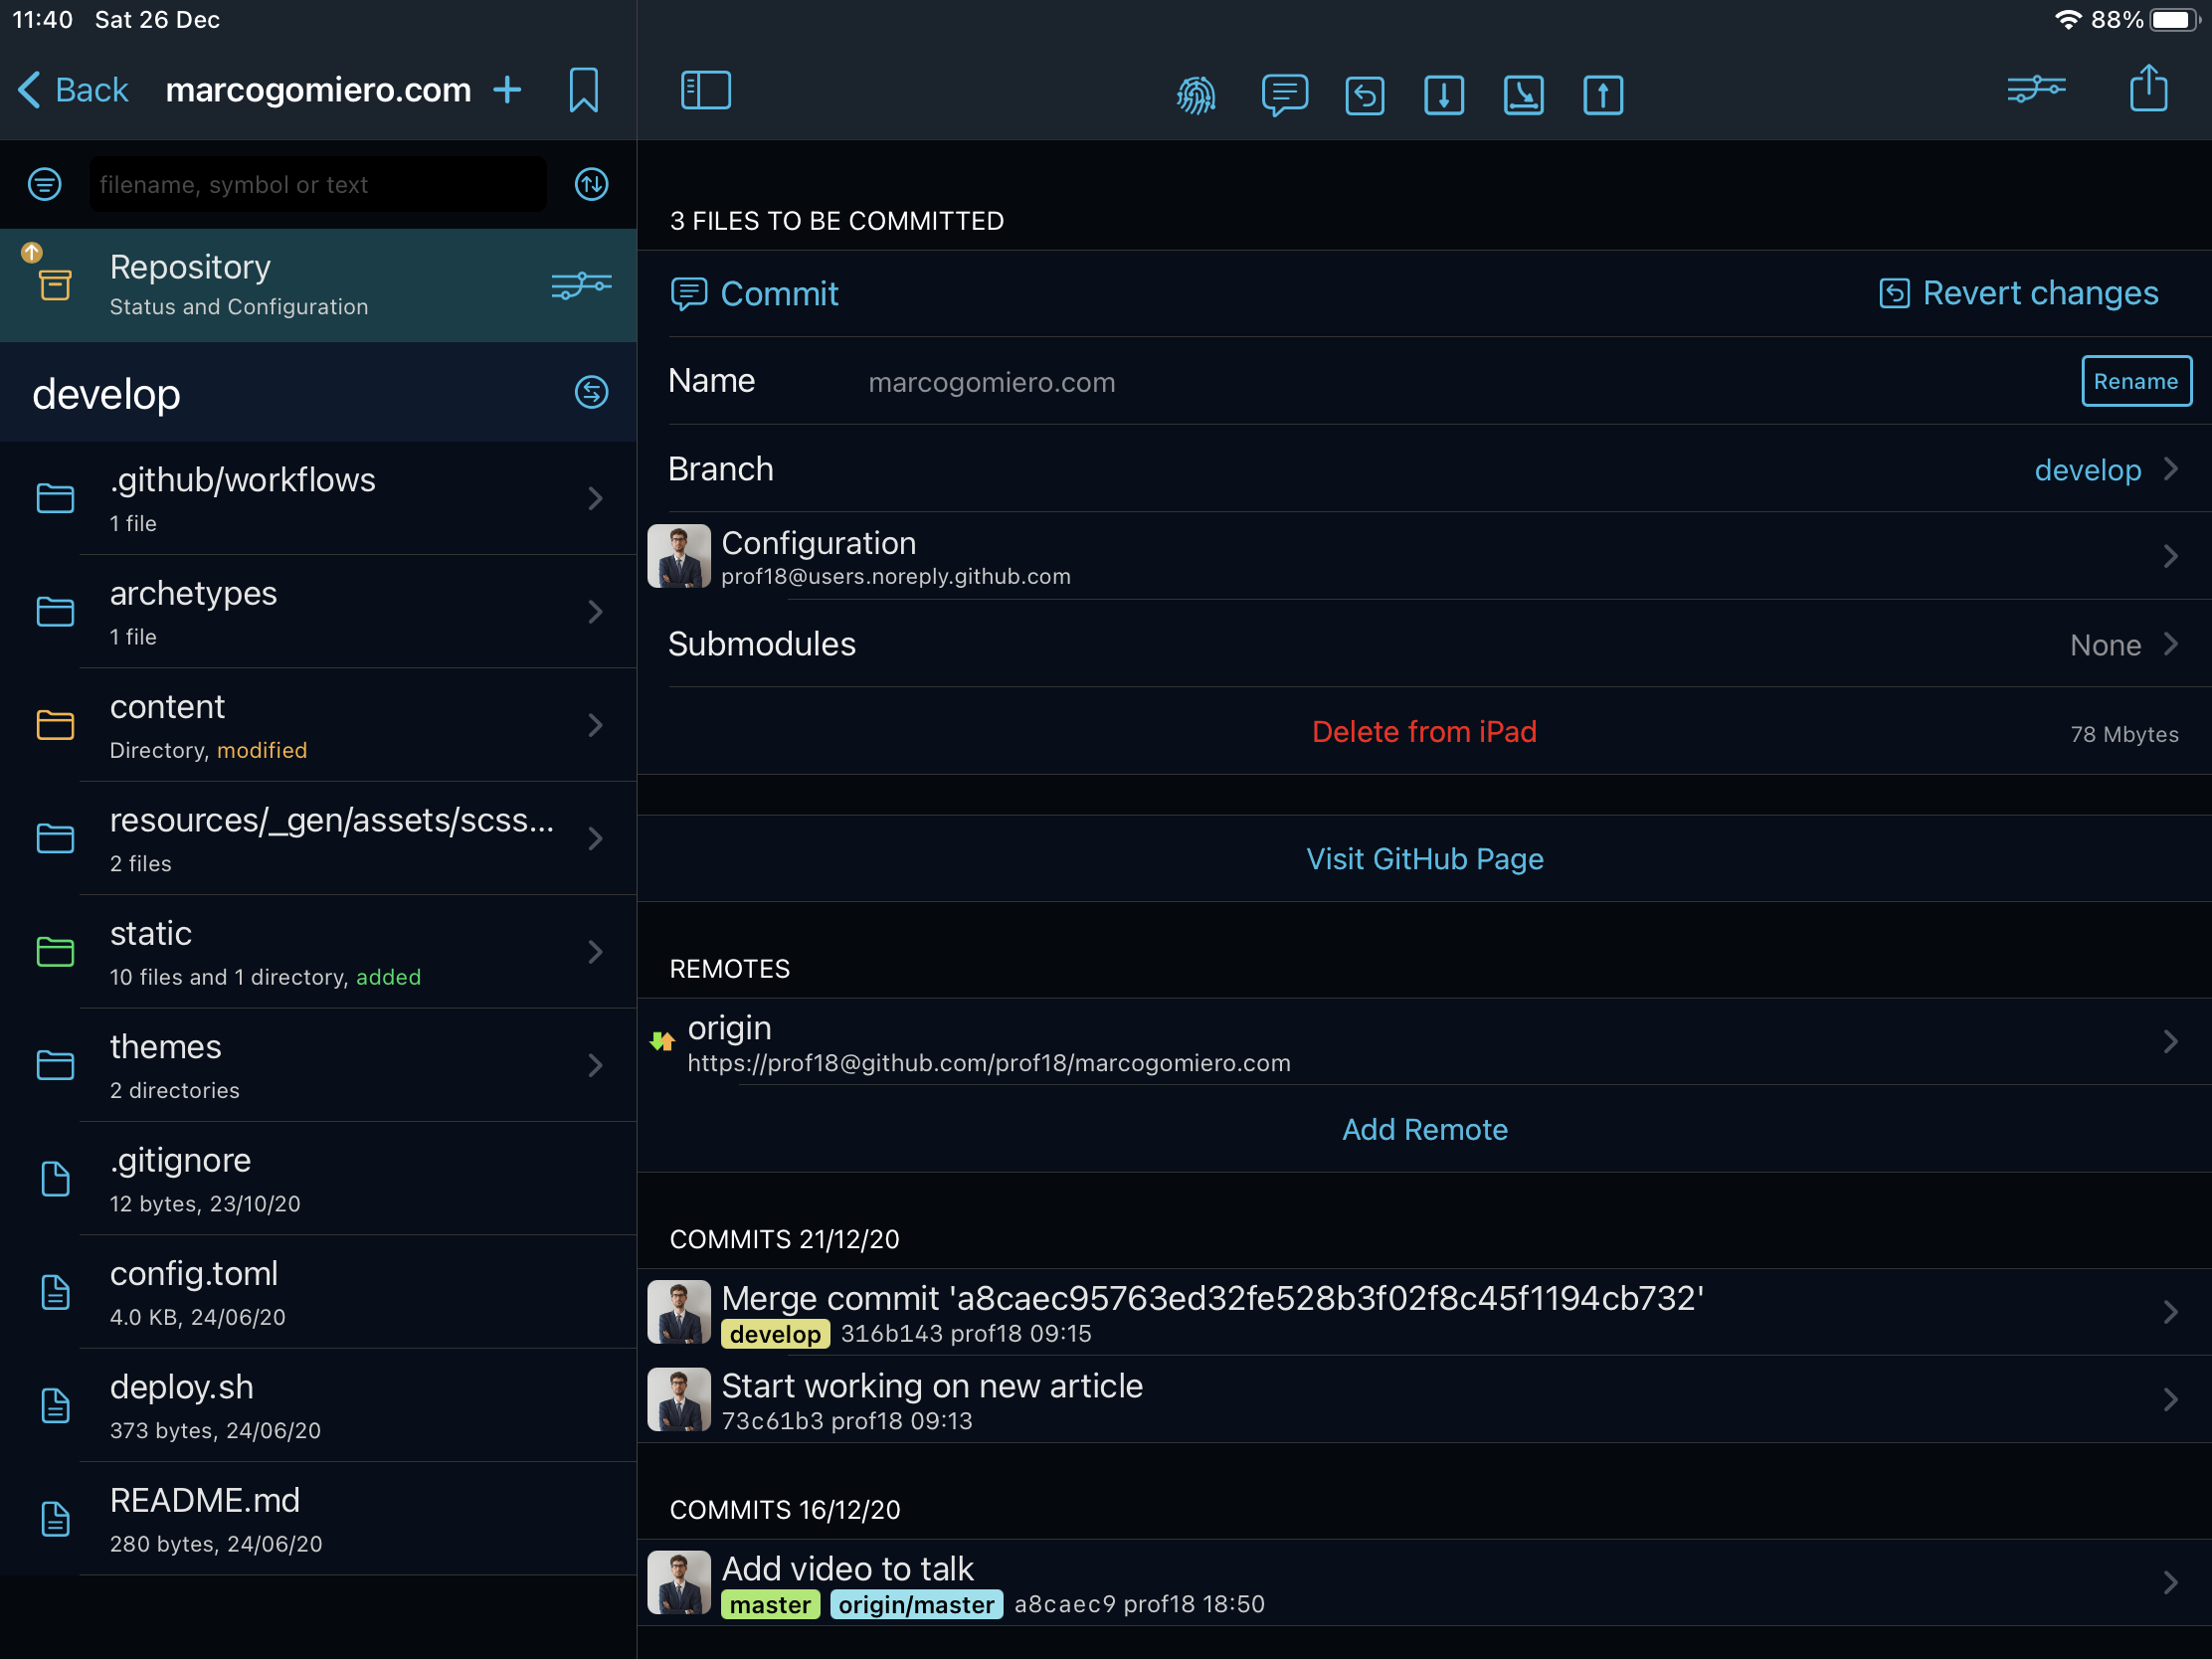
Working Copy
With Working Copy you can browse the content of the repo but you can also make edits with a built-in editor that also provides the user with syntax highlighting. However, the feature that made me choose this client is the support of the File iOs app, that makes the repositories browsable from other apps too.
iOs File app
In this way, I can open and edit an article directly from any Markdown editor - for for the time being my go-to choice is MWeb.
MWeb
I like it because it provides themes, a powerful preview, a useful toolbar with plenty of quick actions, and a lot of keyboard shortcuts.
In the past, I’ve used Pretext, a little bit more basic. In the future, I would like to try iA Writer but it is quite expensive and I don’t know if it’s worth the investment (maybe if there will be a demo or a trial version in the future I can finally make a decision).
And that’s it! I write an article in MWeb and when I finish it, I publish it on the master branch of the Github repo through Working Client. Then, the GitHub Action is triggered and the article is live.
Bonus. If I have to edit or prepare an image for an article (like the ones below), I use Pixelmator, a very good image editor for iOs.
Pixelmator
Automations
After writing some articles, I’ve discovered that there are some boring activities to achieve on iPad, like creating a new article, adding a new image for an article, etc. So, during one of the “its-blogging-time-but-i-dont-want-to-write” sessions (procrastination FTW) I decided to automate some of these boring things.
Add an image to an article
To show an image on a Hugo Markdown page, it is necessary to write a shortcode; for example, for the Pixelmator’s screen posted above the corresponding shortcode is the following:
{{< figure src="/img/blogging-ipad/pixelmator-screen.png" link="/img/blogging-ipad/pixelmator-screen.png" caption="Pixelmator" >}}
So, every time I need to add an image to an article, I need to:
- Create a folder into the img folder of the website (if not present. I create a folder for every article just to keep things clean);
- Move the image from the iPad gallery to the folder created above;
- Rename the image with a more readable format;
- Write the shortcode for the image in the article.
Way too many steps for a lazy person like me!
To try to automate these steps, I started playing with the Apple Shortcuts iOS app. If you’ve never heard about it, I suggest you take a peek. It’s really powerful and it can greatly simplify your life.
A shortcut is a quick way to get one or more tasks done with your apps. The Shortcuts app lets you create your own shortcuts with multiple steps. For example, build a “Surf Time” shortcut that grabs the surf report, gives an ETA to the beach, and launches your surf music playlist. Shortcuts user guide
After some trials, I was able to achieve my goal and, as you can see in the video, when I need to add an image to an article I can launch a shortcut that does all the job for me.
Here’s the “source code” of the shortcut:
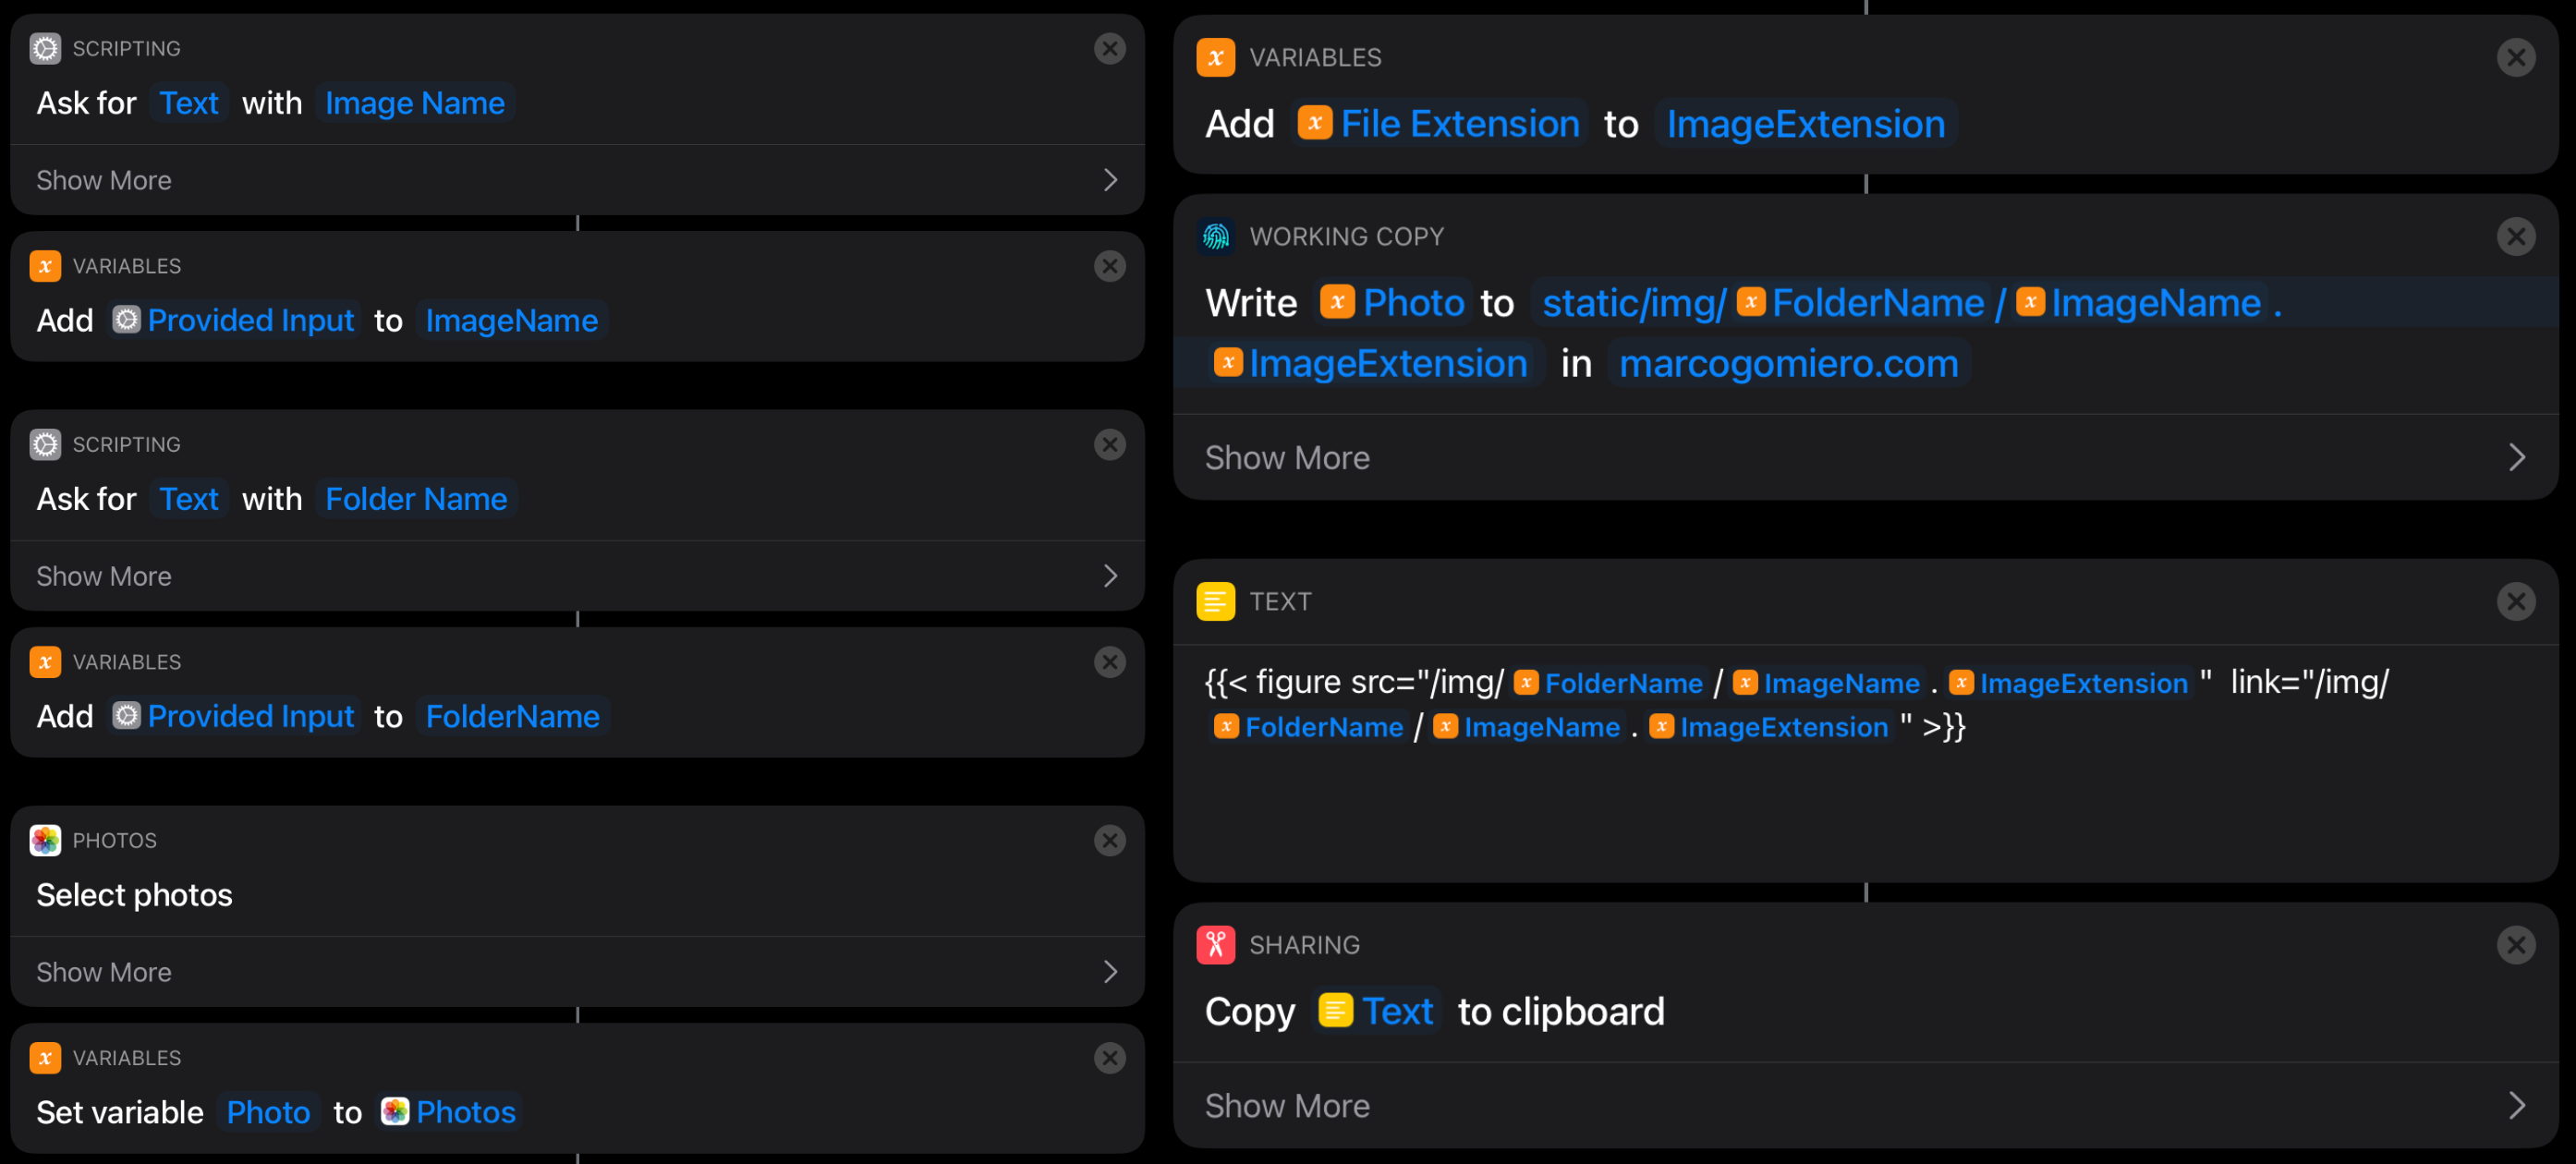
iOs shortcut to move an image from the camera roll to the repo of the site and generate the Hugo shortcode
As you can see in the image above, it is possible to ask for input and then store it in a variable. So, first of all, I receive as input the name of the image and the folder, then I open the system image picker and I store the chosen image in a variable. Then, before moving the image, I extract the file extension of the image and store it in another variable. And now finally, it is time to move the image to the specific folder with the new name. This action is performed with the shortcut support provided by Working Copy. And at the end, I create the shortcode for the specific image and I store it in the clipboard ready to be pasted in the article.
Create a new article draft
Another boring activity is the creation of a new article. That’s because for every article I need to write some metadata at the top, like the date, the title, etc.
---
layout: post
title:  "Running a blog with iPad"
date:   2021-01-01
show_in_homepage: false
draft: true
tags: [Blogging]
---
So, I made another shortcut!
And here’s the “source code” of this shortcut:
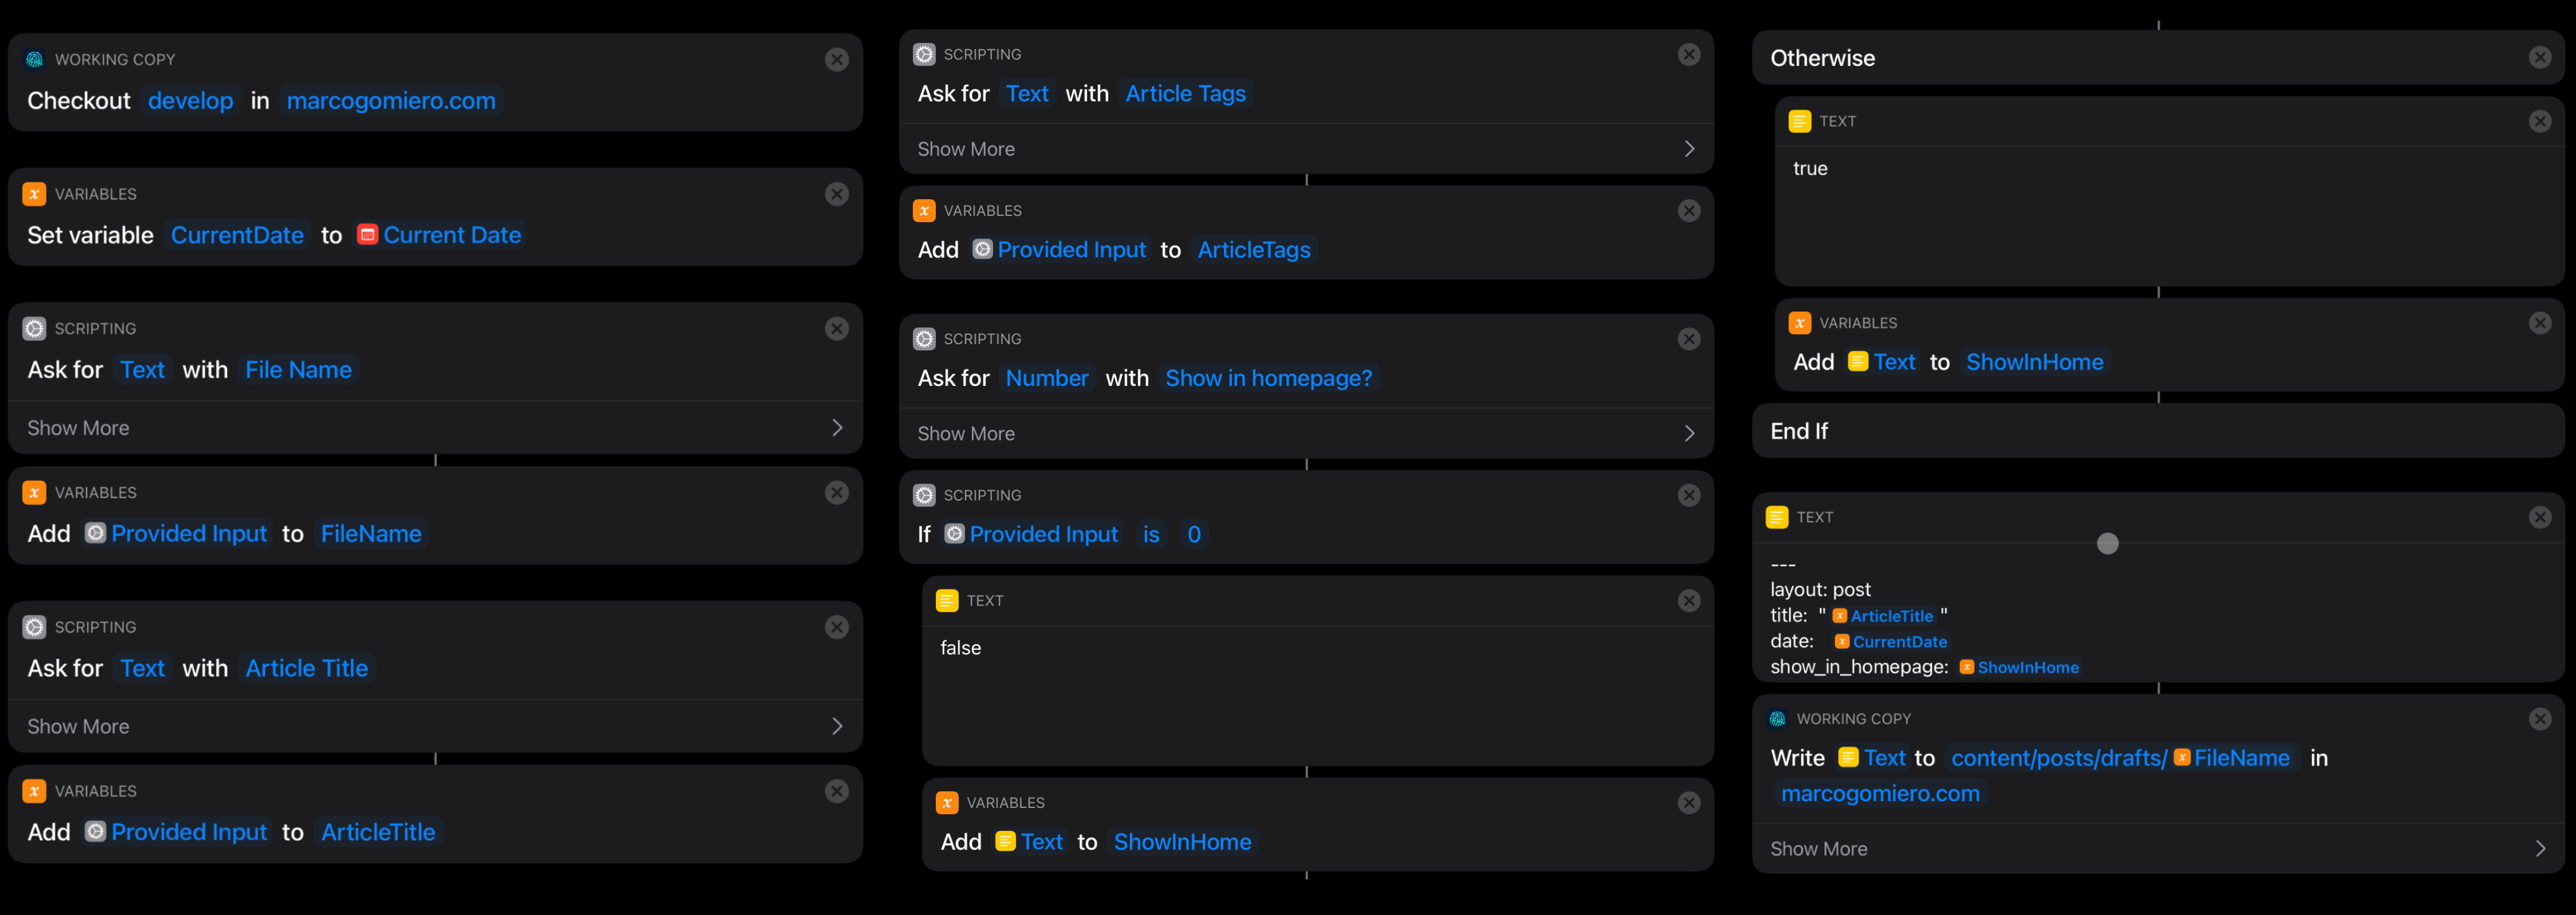
iOs shortcut to create a new article draft with some metadata
The structure is very similar to the other shortcut. First of all, I make sure that I’m in the develop branch of the website where I make all the draft work. Next, I ask for some input that I store in some variables. As you can see it is also possible to do some if/else statements. And at the end, I create the metadata that will be placed inside the new article.
Conclusions
And that’s how I write in my blog. I’m very happy with this setup because it let me only focus on writing. Every “boring” activity is completely automated and in this way, I have “just” to write. And by using an iPad I’m not tempted to re-open my IDE to procrastinate writing.
If you have any kind of suggestions about apps, accessories, whatever, feel free to reach me out on Twitter @marcoGomier.